Basic Information
Course Location: Stonelick State Park
Geographic Location: near Goshen, OH and Blanchester, OH (39.21762, -84.07390)
Date Visited: October 2022
Number of Holes: 18
Course Length: 4680-6246 feet, par 59/60
Cost to Play: free
Difficulty Level: intermediate
Carts: should be fine here
Beginner Friendly? no
Potential to Lose Discs: high due to dense brush and a lake, including a forced carry over the lake
DG Course Review Page: https://www.dgcoursereview.com/course.php?id=11795
UDisc Page: https://udisc.com/courses/stonelick-YmI9
Course Walkabout Video, Front 9:
Course Walkabout Video, Back 9:
Driving Directions: On the northeast side of Cincinnati, take I-275 to SR 28 (exit 57). Exit and go east on SR 28. Drive SR 28 east 2.7 miles to Woodville Pike and turn right on Woodville Pike. Drive Woodville Pike east to its end in 7.8 miles, then turn right twice to pick up SR 727 south. Drive SR 727 south 0.7 miles to the state park entrance on the left. Turn left to enter the park and drive the main park road 0.7 miles to the signed disc golf parking area on the left. #1 tee is back toward the park entrance past the #18 basket and the information kiosk with course map.

Course Constructions:
Tees: concrete tee pads, 2 per hole ("long" and "short")
Baskets: Mach VII baskets; 1 per hole but most holes have multiple possible basket positions
Signage: course map near parking lot; tee sign on each tee; occasional directional sign to next tee
Amenities: picnic shelter and picnic tables, swimming beach behind #10 basket, vault toilet near #12 tee, other amenities elsewhere in the park
Summary Review: 5 Stars (out of 5)
Built only in 2020, the disc golf course at Stonelick State Park has quickly earned a reputation as being one of the best courses in the Cincinnati metro area. The course is designed for the skilled recreational player, yet the course only has 3 or 4 really long and hard holes. Thus, weak recreational players can make it around even if it takes a large number of throws. You could easily host a tournament here. The terrain is fairly flat with mostly gentle contours, but there are a few shallow but steep ravines. The course constructions are second to none. The course offers a nice mixture of long and short holes plus open and wooded holes, although a couple holes might be too open. The course maintenance was nearly flawless, and I had no trouble following the course's route, which more or less goes clockwise around the parking lots and picnic areas. Mud will be an issue if it has rained recently: the dirt here really holds the water. I saw a few other pedestrians near the course, but they did not interfere with my throwing line. In total, this course is among the best I have ever played, and it is worth a trip from almost anywhere to play here.
Hole-by-Hole Review
Distances, taken from hole signs, are for the short tee. The range of distances account for the various possible basket positions. Picture sequence for each hole is 1) short tee, 2) approach, 3) basket to tee. (Aside: I focused on the short tees for this review because most recreational players will want to play from the short tees on this course.)
Hole #1: 553-617 feet, par 4 (photos are basket position A)


Comments: talk about a baptism by fire! The two longest and (possibly) hardest holes on the entire course are among the first three holes, so you had better warm up before you step on the first tee. The placement of the long/hard holes also contributes to some people thinking this course is harder than I think it is. The fairway is quite wide for now, but some small trees in the middle of the fairway will grow and make the gaps tighter in time. The A basket position is quite challenging because it is tucked in the dense woods with big trees to the left; the B basket position is long but straightforward. #2 tee is behind the B basket position.
Hole #2: 168-235 feet, par 4 (photos are basket position A)


Comments: a large number of small trees stand between the tee and the basket. This hole seems way too short to be a par 4 to me, but maybe that makes up for the preceding and following holes. #3 tee is to the left.
Hole #3: 505-700 feet, par 4/5 (depending on basket position; photos are basket position C)


Comments: this hole starts in a fairly open area, but about 250 feet from the tee the fairway enters a tight chute with dense woods on either side. The low ceiling also must be considered. The parking lot to the right is out-of-bounds (OB). There are no easy basket positions on this hole, but the C basket position is a real beast, even at a par 5: a concrete pier elevates the basket several feet above the ground, making putting and retrieving your disc more interesting. #4 tee is to the right near the entrance to the parking lot.
Hole #4: 192-335 feet, par 3 (photos are basket position A)


Comments: this could be a boring hole, but the fact that it plays very differently based on the basket position makes it more interesting. The B and C basket positions make this hole a tight heavily wooded hole, while the A basket position makes it a more open hole with the OB park road 40 feet to the right. Overhanging trees have to be dealt with regardless. #5 tee is into the woods to the left.
Hole #5: 162-365 feet, par 3 (photos are basket position C)


Comments: the design concept is similar to the previous hole, but this slightly downhill hole is very tight with lots of small trees to negotiate. The B basket position makes this a short easy hole, maybe even an ace opportunity. The A and C basket positions offer more length and challenge. The lake comes into view for the first time on this hole, adding to the scenery. #6 tee is to the right.
Hole #6: 261-267 feet, par 3 (photos are basket position A)


Comments: this hole starts in a fairly open area, but the basket is in an area of dense woods with many small trees. Thus, a low and accurate throw is necessary. #7 tee is uphill to the right.
Hole #7: 179-253 feet, par 3 (photos are basket position A)


Comments: now come the two worst holes on this course. This hole plays gradually uphill with dense woods to the left, but there are no obstacles directly between the tee and basket. #8 tee is to the left.
Hole #8: 207-258 feet, par 3 (photos are basket position A)


Comments: a near-copy of the previous hole except it plays downhill instead of uphill. #9 tee is to the right.
Hole #9: 241-286 feet, par 3 (photos are basket position A)


Comments: the fairway is fairly wide with dense woods on either side, but several small trees dot the fairway. The lake sits only a few feet behind the A basket position, so don't overshoot. #10 tee is to the right.
Hole #10: 200 feet, par 3 (only 1 basket position)


Comments: this course's signature hole. A forced carry of 150 feet over lake water is required, and the basket is on a peninsula surrounded on 3 sides by the lake. Many courses have an "island" hole, but this hole comes closer to a real island than most. #11 tee is down the lake shore past the beach area.
Hole #11: 222-420 feet, par 3 (photos are basket position C)


Comments: gradually uphill, this is another hole that plays very differently depending on which position the basket is in. The A and B basket positions make for a fairly straight, open, and boring hole. The C basket position makes this hole a long dogleg left and brings more large trees into play. The parking lot to the right is OB regardless. #12 tee is to the right near the vault toilet.
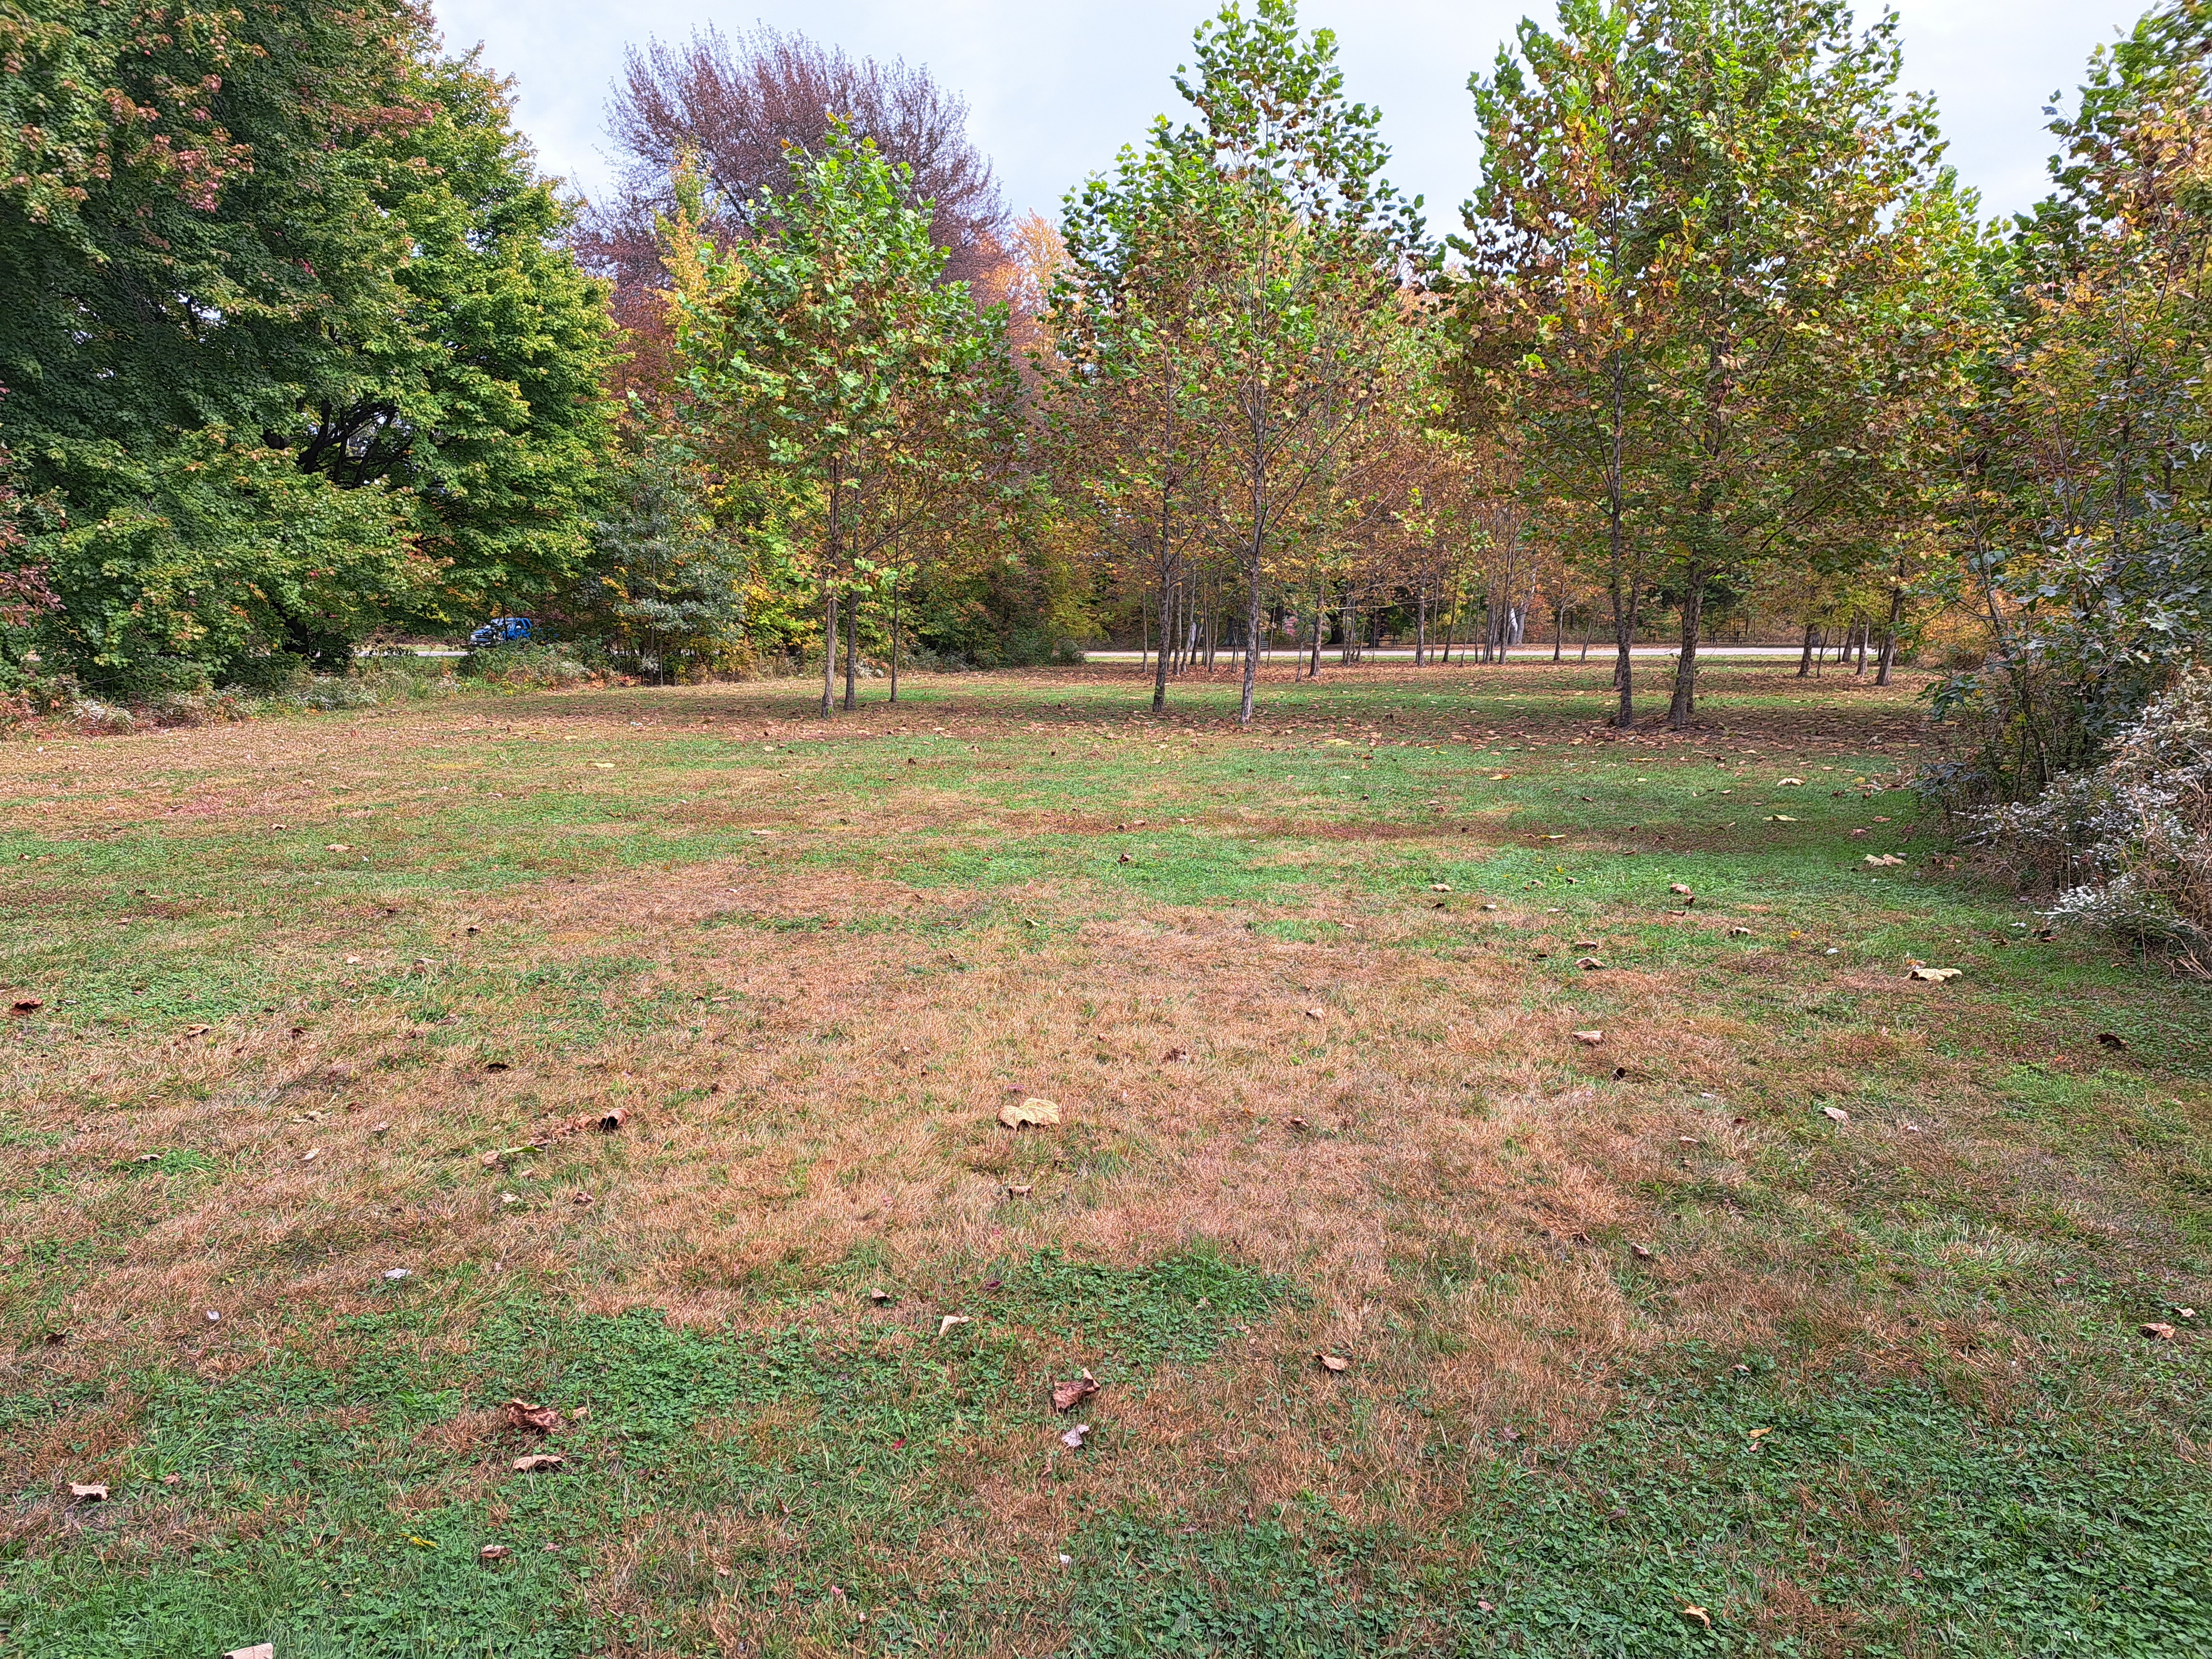
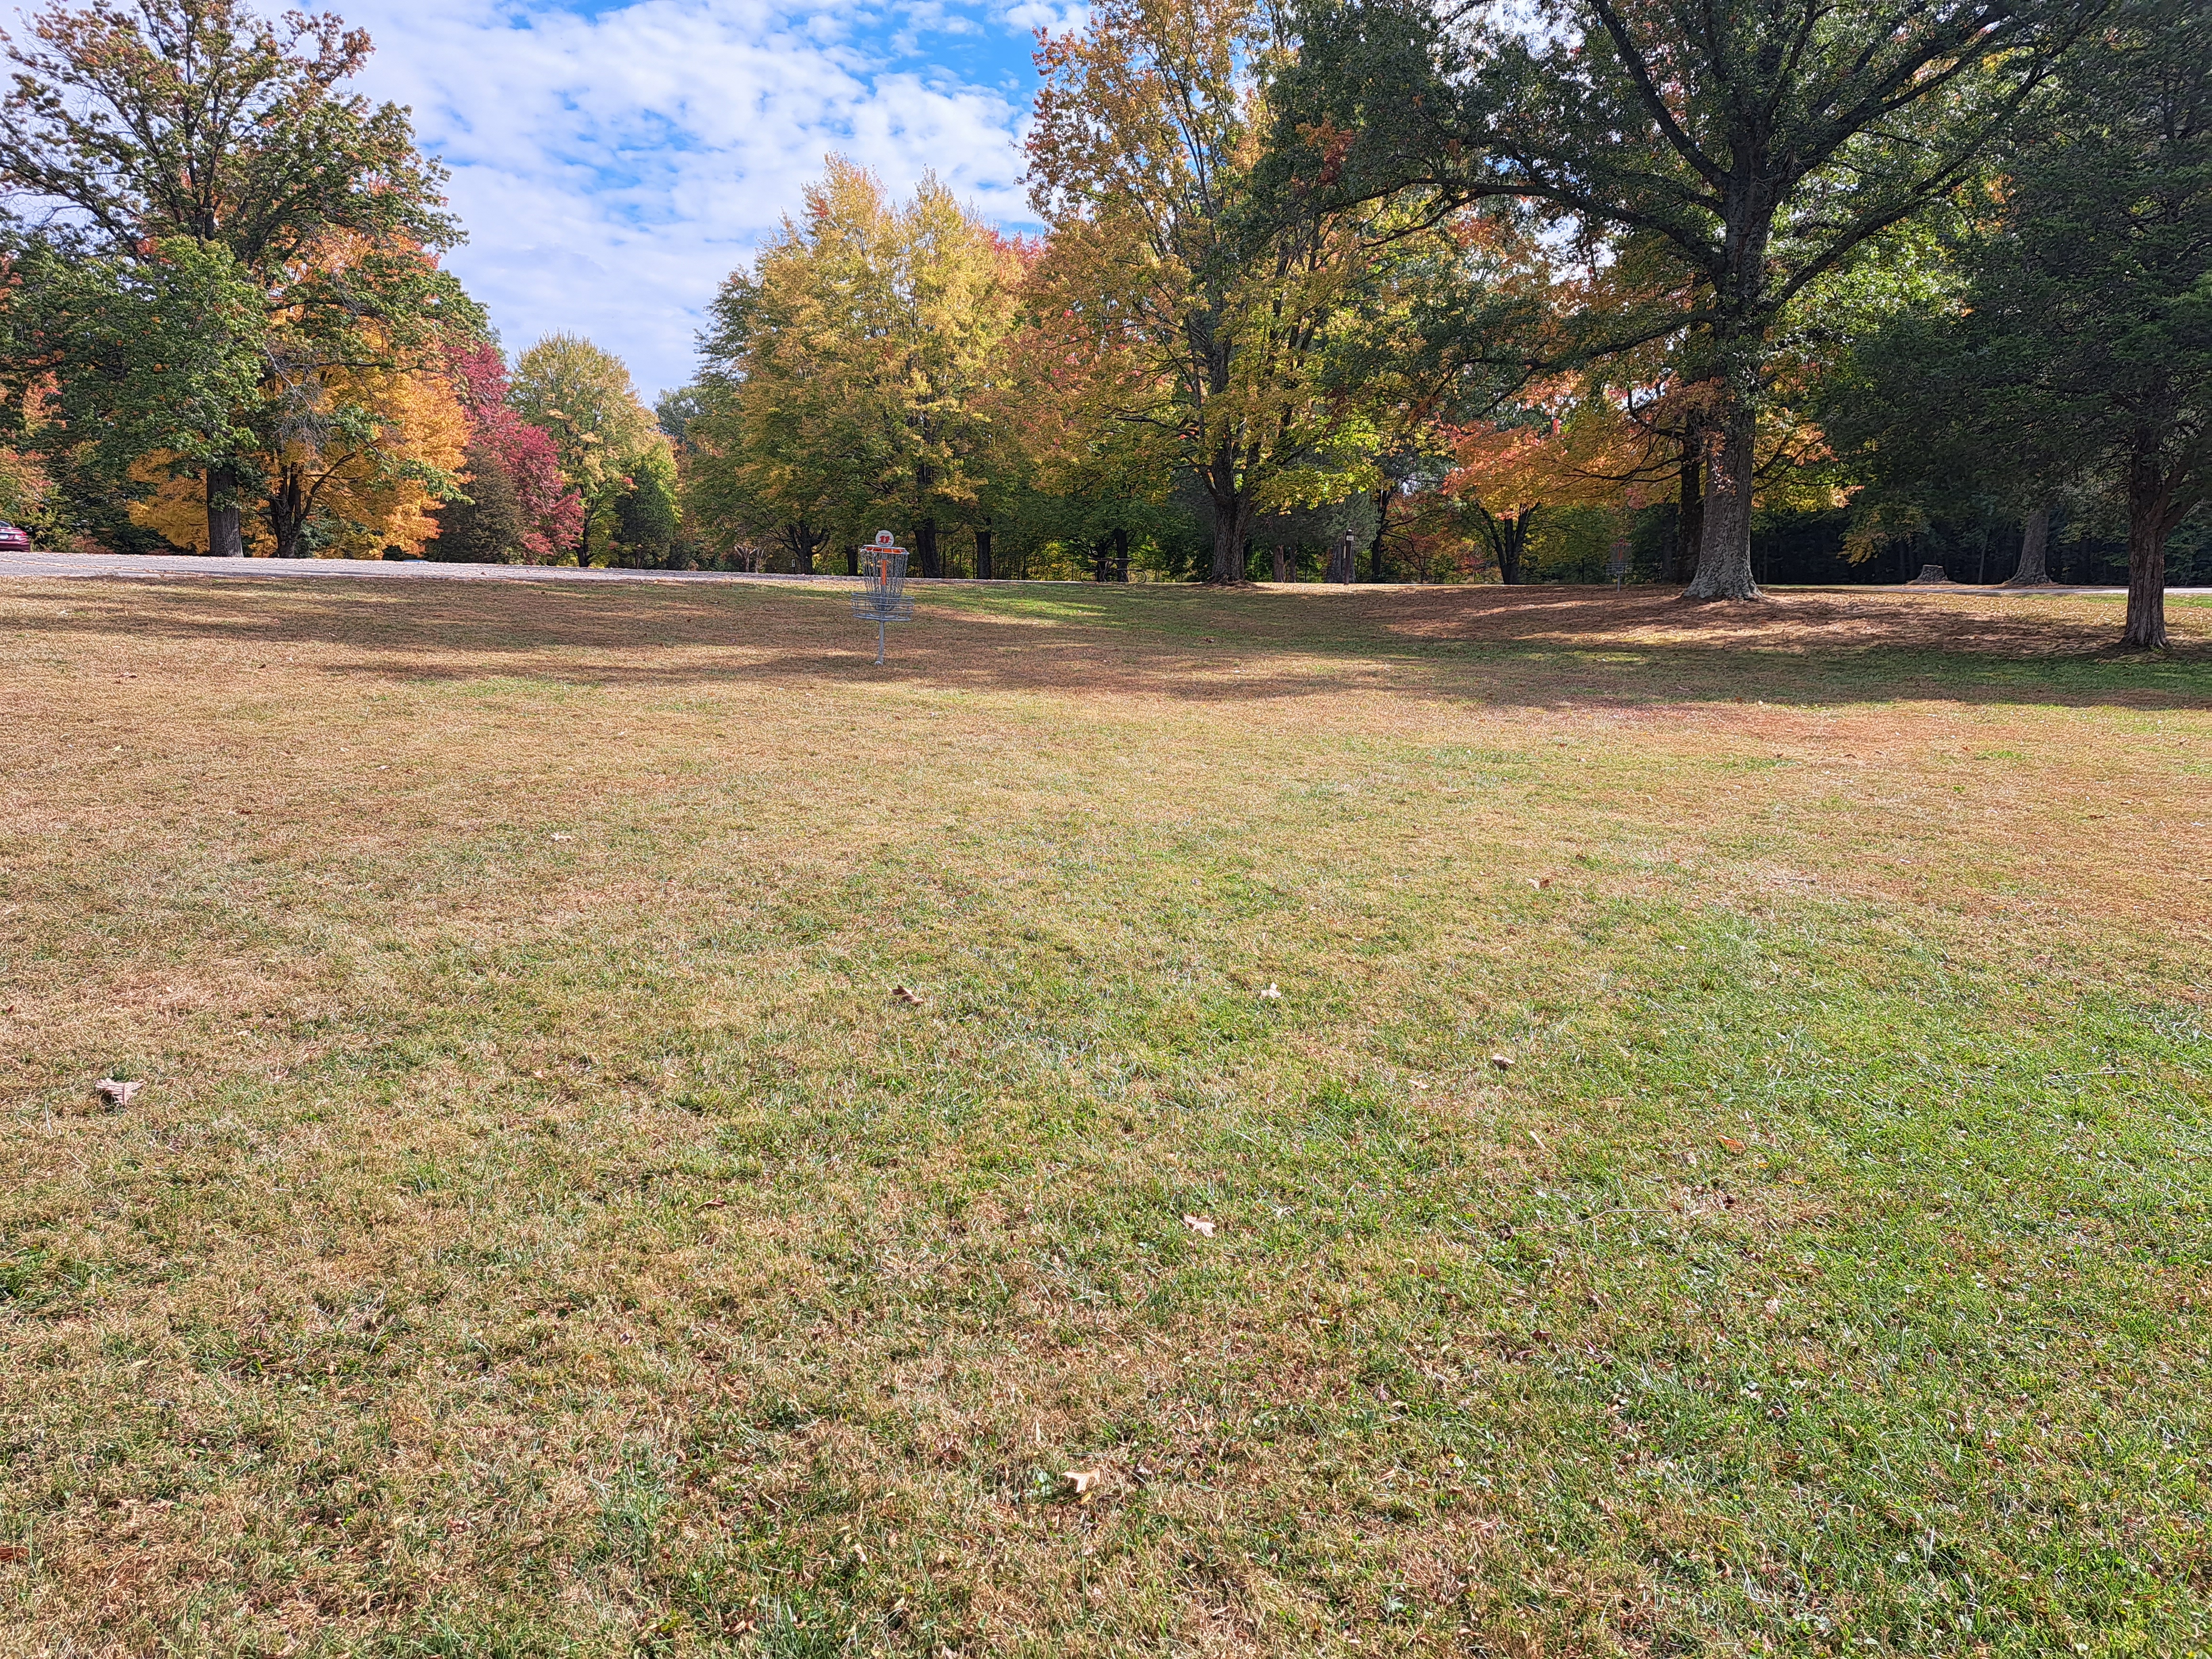
Hole #12: 213-253 feet, par 3 (photos are basket position A)


Comments: a fairly flat hole that plays through an open mowed-grass area dotted with large oak trees. This hole is the closest thing this course has to a traditional parkland disc golf hole. #13 tee is to the left.
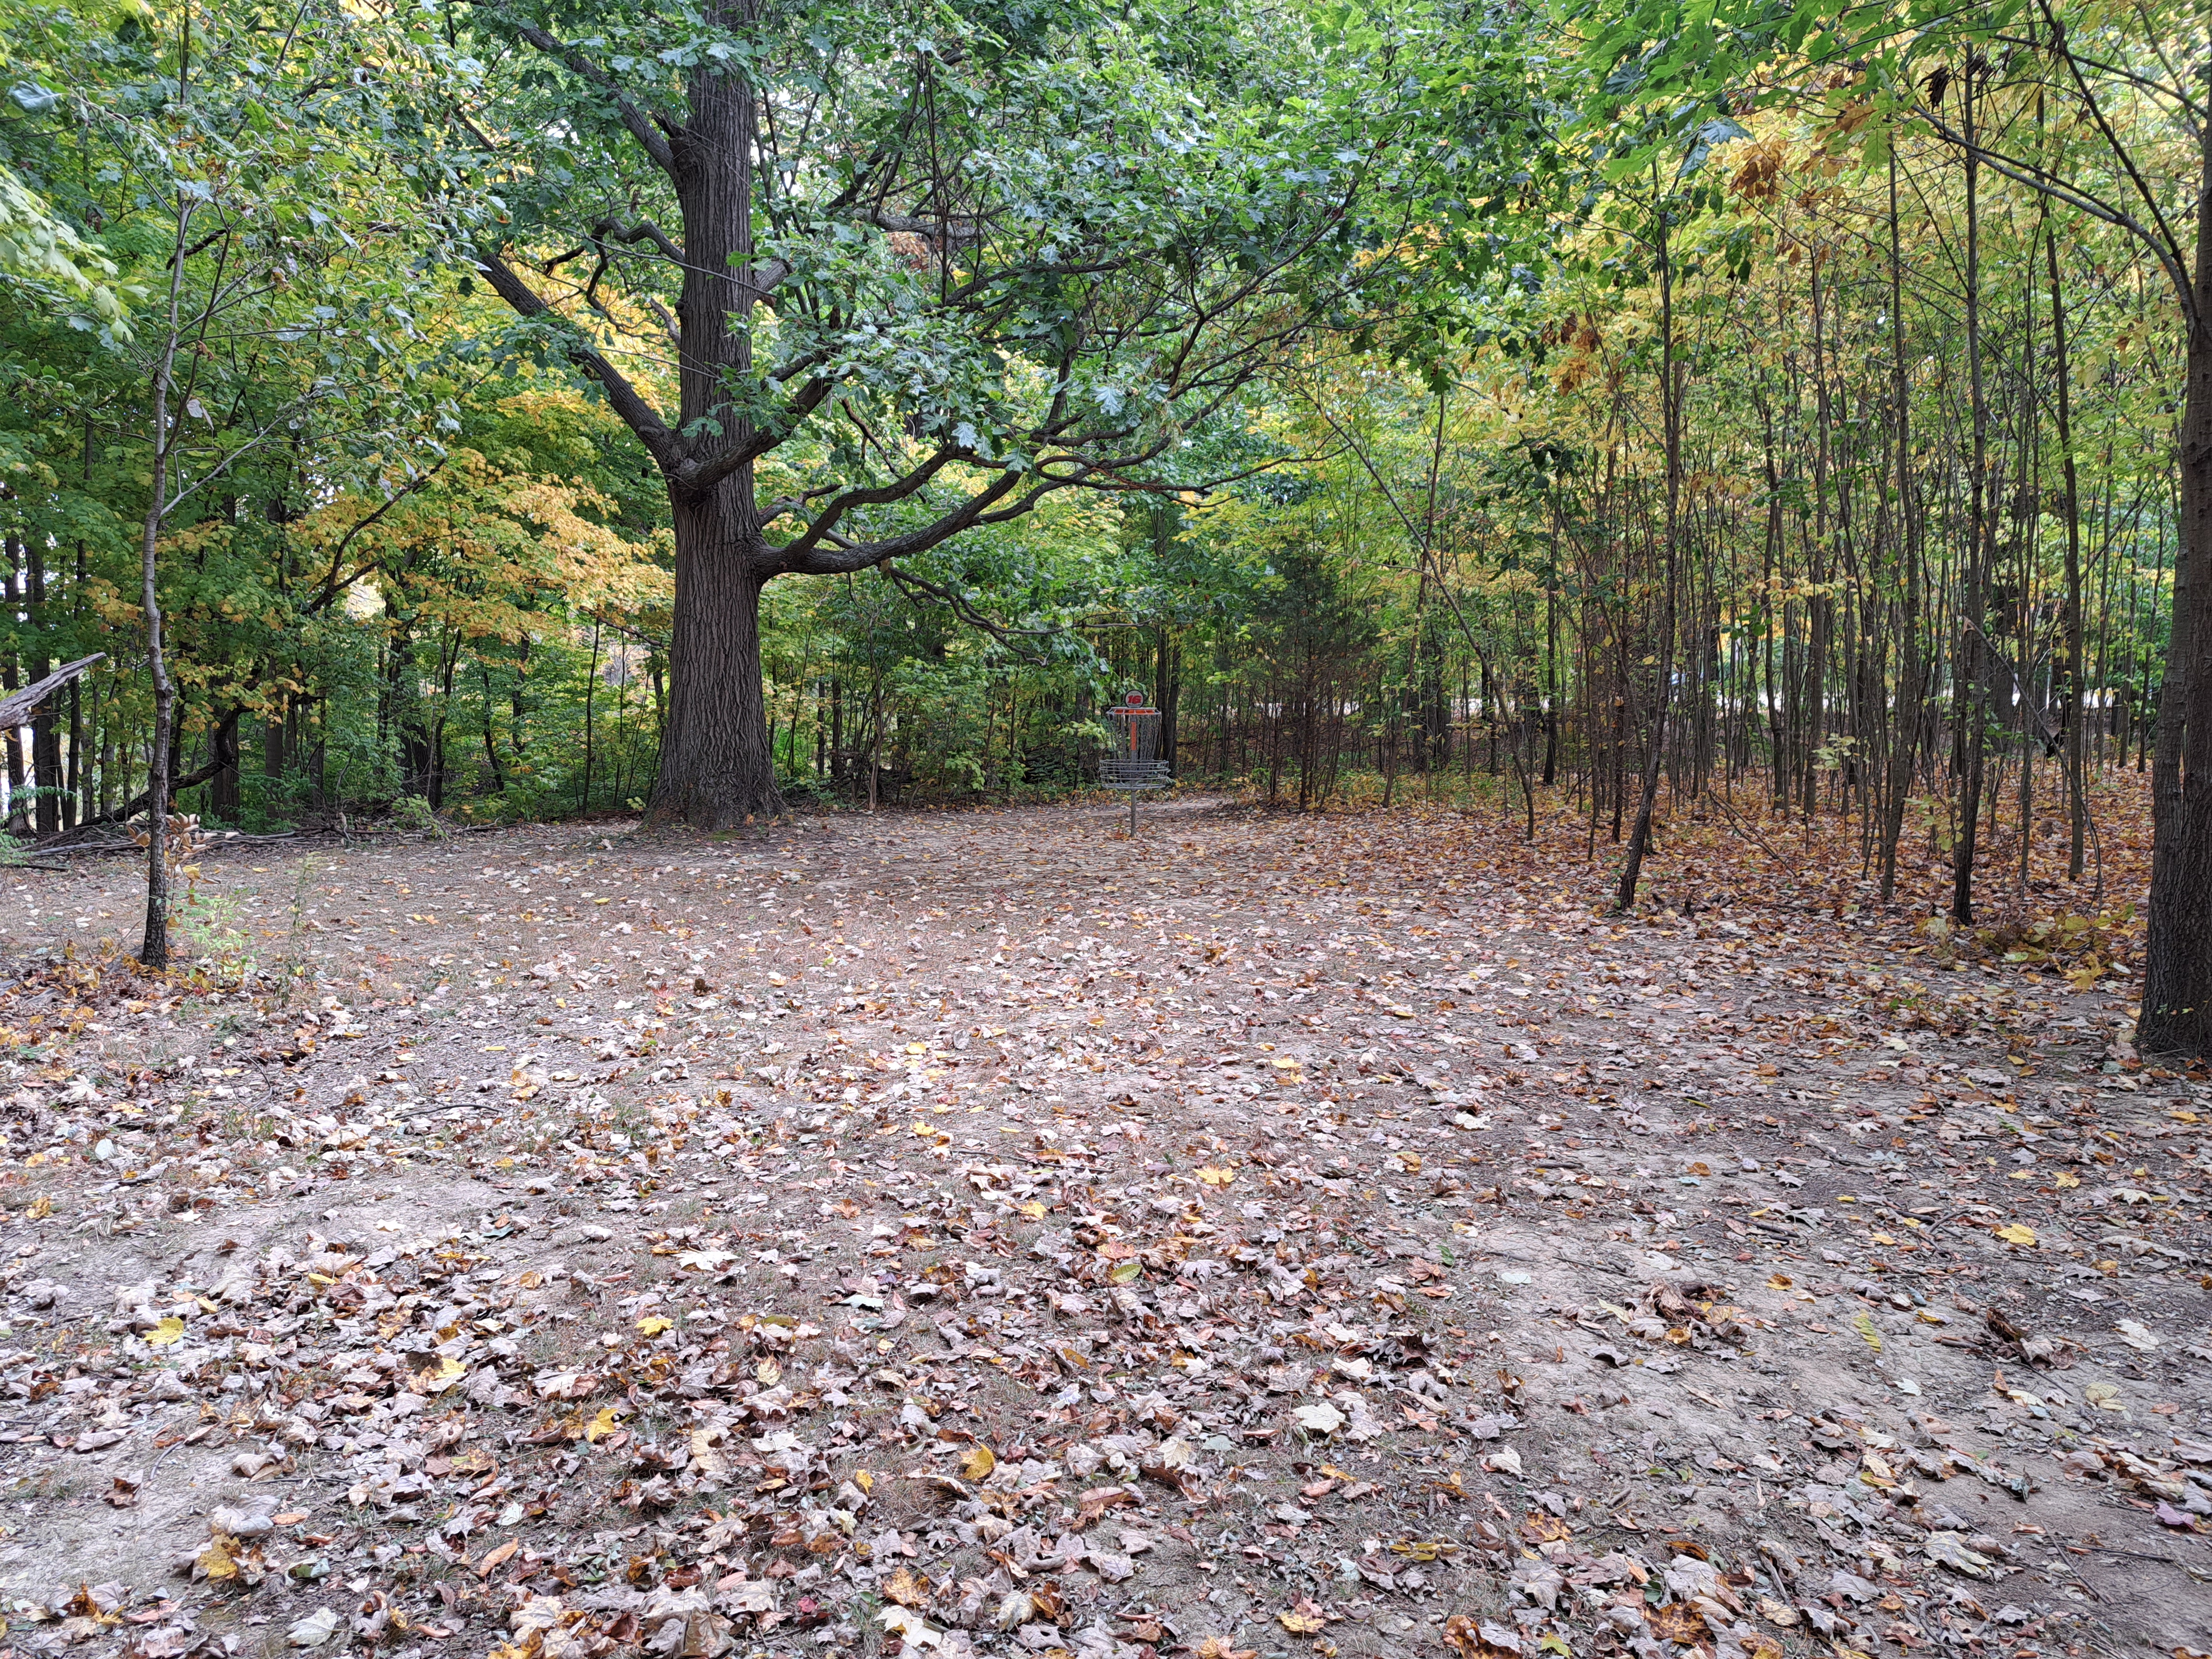
Hole #13: 235-315 feet, par 3 (photos are basket position C)


Comments: the lake forms a scenic backdrop on this gradually downhill hole. A large number of medium sized trees need to be negotiated, and the three possible basket positions require very different lines of play to reach. This is a very interesting and technical hole. #14 tee is to the right.
Hole #14: 285-420 feet, par 4 (photos are basket position A)


Comments: an uphill hole that could be rather boring or rather thrilling depending on the basket position. With the B basket position, this hole is a fairly open slight dogleg left. With the A basket position, this hole is a sharp dogleg left with its last 150 feet requiring tight lines through dense woods. The lake also comes into play on the left if the basket is in the A position. Unless you enjoy a tough challenge, pray the basket is in the B position. #15 tee is up the wooden steps to the right of the A basket position.
Hole #15: 237-420 feet, par 3 (photos are basket position A)


Comments: another hole that could be rather easy or very hard depending on the basket position. The A and B basket positions feature steep drop offs to the left and/or beyond but reasonable lines of play. The C basket position is particularly harsh: you have to throw across a very steep ravine to a basket perched on the edge of the ravine. Regardless of basket position, a mandatory (mando) prevents you from throwing into the picnic area to the right, some overhanging trees form a low ceiling, and a steep hill (almost cliff) to the left means any disc that misses left will likely be lost in the lake. #16 tee is to the right at the edge of the ravine.
Hole #16: 154-253 feet, par 3 (photos are basket position A)


Comments: a fairly tight heavily wooded hole that plays very differently depending on the basket position. The A and B basket positions are straight forward, but the C basket position is a sharp dogleg left to a basket with sharp dropoffs long and left. Regardless, a mando prevents you from throwing into the picnic area to the right. #17 tee is behind the basket.
Hole #17: 171-186 feet, par 3 (photos are basket position A)


Comments: this short, scenic, downhill hole plays out of a tight wooded chute into a fairly open area. The lake can come into play long and to the left. This hole would be the course's signature hole were it not for #10. #18 tee is uphill to the right.
Hole #18: 390 feet, par 4 (only 1 basket position)


Comments: the most controversial thing on this course is 20 feet in front of this tee: a double mando forces you to throw through a gap about 4 feet wide. Many players detest this double mando, and I can't say I disagree with them. Past the double mando, the slight dogleg left plays out of the woods and into a fairly open area. The basket is located atop a stone pedestal to make putting interesting. Modulo the double mando, this is a solid finish to an excellent course.